# 안드로이드 기준
1. react-native-splash-screen 라이브러리 추가
-해당 프로젝트경로에서 실행
npm i react-native-splash-screen --save2. react-native-splash-screen 라이브러리 확인
-package.json 확인

3. MainActivity.java에 코드 추가
3-1. import 추가
// react-native-splash-screen >= 0.3.1
import org.devio.rn.splashscreen.SplashScreenReactPackage;
3-2. onCreate 추가
@Override
  protected void onCreate(Bundle savedInstanceState) {
    SplashScreen.show(this);  // here
    super.onCreate(savedInstanceState);
  }
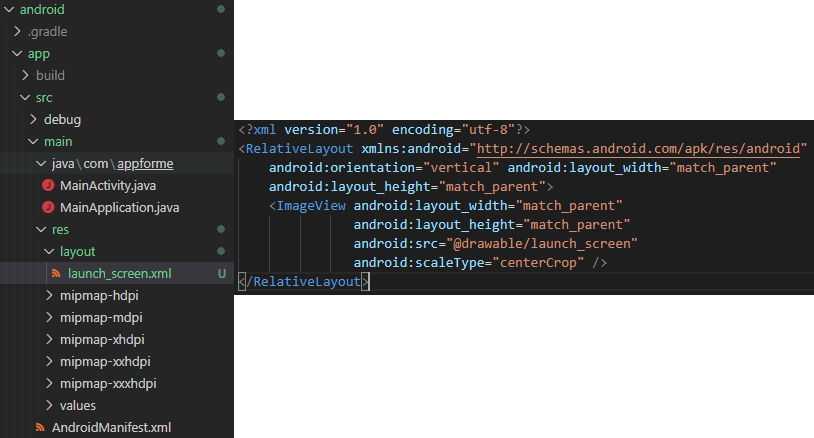
4. app\src\main\res에 layout폴더와 launch.xml 만들기
4-1. launch.xml 작성내용
<?xml version="1.0" encoding="utf-8"?>
<RelativeLayout xmlns:android="http://schemas.android.com/apk/res/android"
    android:orientation="vertical" android:layout_width="match_parent"
    android:layout_height="match_parent">
    <ImageView android:layout_width="match_parent" android:layout_height="match_parent" android:src="@drawable/launch_screen" android:scaleType="centerCrop" />
</RelativeLayout>
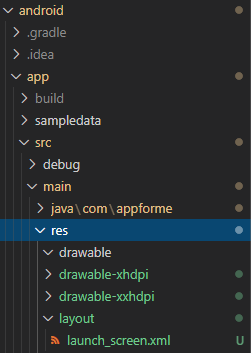
5. app\src\main\res에 drawable-xhdpi폴더, drawable-xxhdpi폴더생성후 이미지 추가
5-1.app\src\main\res\ drawable-xhdpi폴더, drawable-xxhdpi폴더 생성

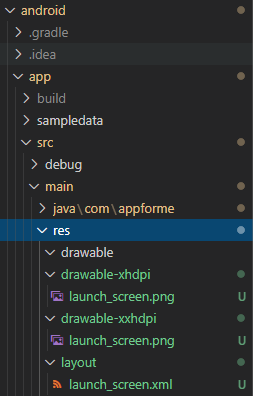
5-2. xhdpi, xxhdpi 이미지 추가하기
-xhdpi예제이미지 경로
-xxhdpi예제이미지 경로
-xhdpi, xxhdpi 예제 이미지를 다운받고 각 폴더에 넣음

6. app\src\main\res\values에 colors.xml 파일추가

-colors.xml 작성내용
<?xml version="1.0" encoding="utf-8"?>
<resources>
    <color name="primary_dark">#000000</color>
</resources>
7. App.js (예제)
import React, { Component } from 'react';
import { View,Text } from 'react-native';
import SplashScreen from 'react-native-splash-screen';

export default class App extends Component {

  componentDidMount(){
    SplashScreen.hide();
  }

  render(){
    return(
      <View style={{flex:1, justifyContent:'center', alignItems:'center'}}>
        <Text>View Text Test</Text>
      </View>
    )
  }
}
8. 프로젝트 실행(테스트)
react-native run-android
출처 : www.youtube.com/watch?v=9_KDgsFGLY8&ab_channel=LirsTechTips
728x90
반응형
'Dev_Study > React-Native' 카테고리의 다른 글
| [React-Native] 1. 프로젝트 생성하기 (0) | 2021.01.15 |
|---|